Domesticity, stay-at-home-mom

Nap mats for my girls!

I love this pic of Katie with her new nap mat!

OK so today is the first day of preschool……

Well in preparation for preschool we needed a few things.  Especially since this will be Bella’s first year.  Grandma Fish got her a backpack and matching lunchbox but she still needed a nap mat.  Last year we sent K with a 3 dollar roll out mat that looked like a yoga mat and her dora blanket and a small pillow.  This year I was determined they would have something more practical, simple and pretty.  So I started doing some nap mat research.  There seemed to be a few types ranging from ugly blue on one side red on the other plastic folded up ones like I had as a kid 20 something years ago all the way up to adorable built in pillow and blanket pretty fabric ones that rolled up and had a carrying handle.  OK, so the practical, simple (all-in-one, mat/pillow/blanket) and pretty was best represented by the most expensive ones out there.  These ranged in price from 40-80 dollars each!  Now with two girls that are almost twins (10 months 3 weeks apart) who want everything their sister  has…. the price would be 80-160 dollars… plus shipping!  OK well if you don’t know, minister’s families have tight budgets, and youth minister’s families have tighter budgets.  So I knew trying to convince my husband that these were a-dor-a-ble and simple and practical wasn’t worth my breath for that price.  Also I couldn’t justify the price to myself either 😦  so I was sad and frustrated by it all.  Until I saw that some crafty moms had attempted sewing their own.  I sew!  It looks semi-difficult, but I’m always up for a challenge! 

I was now a momma on a mission!  I decided I would not spend more than 10 dollars per child to make them and do my best to use some materials I already had.  So off to Hobby Lobby I went and found the sweetest corduroy in a chocolate-brown with bright flowers all over it. 

gorgeous chocolate brown fabric with bright floral print I fell in love with!

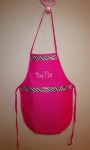
I was in love with the soft pretty corduroy but not in love with the price, 9.99 a yd.  and well I needed 3 yds of this.  Thank goodness I got 40 % off though because it was a seasonal (fall I guess) fabric  so it was really 5.99 a yd and cost 18 dollars total.  So with very little of my 20 dollar budget left I got a roll of matching hot pink/magenta ribbon (half off) for a dollar to make the ties with.  Now down to zero money left I had to come up with everything else from my craft supplies.  So I went home and found a fleece blanket in the same bright green as the fabric I’d bought cut it in half and used it as the attached blanket.  I found a barely used bag of polyfil, to stuff the pillows with and took two old baby blankets from the girls boxes of baby stuff and used them as the liner for the mat part.  There were a few more things like buttons, thread etc.  but you get the idea.  So after many hours measuring, cutting, pinning, sewing on machine and by hand, a little seam ripping, and stuffing…. the girls have cutesy, made with love, not-so-professional-looking nap mats for preschool. 

My girls with their finished mats
Katie wearing her mat
Bella wearing her mat
side view of both mats


this is the mat open with the extra blanket folded under
this is the mat open and the blanket unfolded so you can see how much extra I gave them to cover up with and snuggle
this is the open mat with the blanket open so you can see how its attached
Katie laying in her mat

I am happy with them all in all.  They aren’t perfect, but they only cost me 20 dollars and some time.  Total savings 60-140 dollars!  The girls love them and know I worked hard on them out of love for them, that is more important than buying them any day even if we could. 

Happy napping to my girls….  🙂

Johanna

Birthday Party, craft, Domesticity, stay-at-home-mom

and 5 months later…..

my sweet kids... love this pic, Noah drumming on Belle's head.... so normal 🙂

Ok, wow!  Summers are super crazy in our house and just before the summer started our house experienced a very rough few months with our son.  He had ear infections constantly.  This meant very little sleep, lots of crying/fussing, and a very sad and in pain baby boy and with two girls 2 and 3 who had plenty of sleep…. this mommy’s sanity was definitely in question more days than not.  Praise God he had surgery to have tubes inserted (on his one year old birthday) and we have been ear infection free ever since!  Then the summer started, and if you are in the youth ministry you  know this is the craziest and busiest time of the year.  Trips, VBS, camps, conferences, splash days, concerts, etc.  Its crazy but wonderful and such a blessing in more ways than I can count.  Now that school is starting and the dust is beginning to settle I am excited for this new season of schedules, less trips, more family time, seeing my girls grow and learn in preschool, focusing on my son those 2 days a week the girls go to school, fall, college football, and so much more.  I’m going to try and be a more consistent blogger also.  Its something I enjoy and much like my many journals its relaxing.  It also saves me a lot of time catching friends and family up on our lives, and sharing photos of the the kids. 
So I guess I’ll give a quick review of the last few months:

April – Noah had ear infections and sleep deprivation and stress, is all I really remember

May – Noah’s ear tube surgery!  Noah’s first birthday (Noah’s ark themed, yeah yeah I know, I figured it was the only year I could get away with being corny with his name without him complaining about it 🙂 ) 

Noah on his birthday morning getting ready for tube surgery
Noah's Ark cake and two by two animal cupcakes 🙂
Noah's ark cake (the inside is a rainbow cake.... as I said corny but I love it)

June – Our 7 year anniversary, we celebrated in Austin, TX a very artsy city which I adored.  Lots of gardening!  Church softball (Eric injured his ankle…. I did too but not a cool softball injury like his, mine was my lame clumsiness).  Went to Joplin a lot to help with the victims of the tornadoes (gave me a new appreciation for how devastating natural disasters can be)  Got to see Taylor Mason for the 3rd time in person, loved it!  Made a fun spiderman cake for an adorable four year old boy.  Eric turned 28, we had a dinner mystery party for him in TX.  Went to Woolaroc kidsfest (amazing, seriously so much fun).  Got to see Hillsong United in concert, for free!  A great friend won backstage passes, dinner with the band, and concert tickets for Eric through a youth minister contest!  indescribable worship experience.  Girls attended a summer program at their preschool one day a week, which they loved. 

this is at the bat bridge in Austin TX on our anniversary... its the largest urban bat colony! It was breathtaking!
Our garden 🙂
One of our many huge and tasty cucumbers!
The youth group and college class with Taylor Mason 🙂 funny night!
Spiderman cake
Woolaroc kidsfest
I love the headlock K has B in, in the Woolaroc museum
My Beautiful Belle with her bug face paint (she has a thing for bugs)
hillsong united backstage passes!

July – My girls called american flags “a-miracle flags” all through the 4th of July season, it was so adorable I couldn’t bring myself to correct them. Bella turned 3 so we had a bubble guppies party for her.  I had two 3 year olds for a month and a week and can I say C-R-A-Z-Y???  We went to church camp, for a great week and I got to do some worship art and teach a class on  it.  We went to Lake of the Ozarks for CIY and it was a lot of walking but a powerful message.  We also did some mission work with a small church and then at a homeless day shelter called Hope Faith Ministries in Kansas City.  Life Changing is all I can say about this great trip with 18 teens and 7 adults.  I can’t wait to go back to Hope Faith and work there again!  We took the kids to Dallas and back in there too.  Lots of traveling and packing and unpacking.  Oh and an elementary kids splash day.

my favorite 4th of july pic of the kiddos
Noah's onesie on the fourth 🙂
Bella's bubble guppies cake
Annabelle's cake
at Hope Faith Ministries with our teens
 
August – Well so far we’ve had a week of VBS.  Katie turned 4 and asked for a Rapunzel birthday party (oh and that I turn the house into a castle and make a tower cake…).  She had a fun party and I got to stretch my creativity muscles and use items we already had to accomplish that castle/tower look she wanted.  We are getting ready for school now, vaccines, open house, paperwork, etc.  This will be my first year sending both girls to preschool, its only Tuesday and Thursday but I’m still feeling a little sad about it.  My kids are my heart. 
Katie as Rapunzel, I love this girl
my girls after vbs western night 🙂

More to come soon 🙂  I’ve been crafting and painting lately so I’ll post on those soon!

Domesticity, Recipes

My Chocolate Earthquake Cookies :)

Well I decided to post the only cookie recipe I can actually claim as “mine”.  Oh and they are an amazing chocolate fix if you ever need one 🙂

Chocolate Earthquake Cookies!


These cookies are pretty easy to make and they have a sweet powdered sugar-coating that gives them a pretty cracked look.  The inside is soft and not too sweet, just pure chocolate heaven!  OK, OK, OK…. here is the recipe:


Ingredients:

4 one ounce blocks semisweet chocolate

1 cup chocolate chips

6 Tablespoons butter

3 eggs

1 cup sugar

1/2 cup flour

2 Tablespoons cocoa powder

1/4 teaspoon baking powder

1/4 teaspoon salt


Directions:

Preheat oven to 350 degrees.

First put the semi sweet chocolate blocks, chocolate chips and butter in a microwave safe bowl.  Heat 30 seconds and then take out and stir, then heat 30 more seconds then take out and stir…. keep repeating until the chocolate is completely melted.  Set aside and let it cool while you do the rest.  Get another small bowl and put your flour, cocoa powder, baking powder and salt in it and stir with a wisk to mix well.  Set this bowl aside also.  Next put the eggs and sugar in a bowl ( I put mine in my kitchen aid mixer) then mix on high for 1 1/2 to 2 min until the egg and sugar mixture is a light yellowish color and looks well mixed.  Now check your bowl of chocolate and make sure it’s cooled to just warm and then mix it into the egg mixture well.  Slowly add your flour mixture until all ingredients are now mixed well.  I usually let it sit in the fridge for about an hour before using to help it harden so your balls of cookie dough don’t spread too much. 

Next, spray your cookie sheet, put a sheet of parchment on it or use a silpat mat.  Get a bowl and put some powdered sugar in it.  Now make small balls of dough (I just used a teaspoon and made it heaping then rolled it) and then roll in the powdered sugar, then place on the cookie sheet.  Make sure to place them far enough away from each other because they will double in size.  Place cookie sheet in oven and bake 9-11 min. 


This is what they will look like when they come out of the oven


Enjoy with a tall glass of milk!


I did!


I hope you and your family and friends enjoy these cookies as much as we do 🙂  Happy baking!

Domesticity, Valentine's Day

Valentine’s Decor Kissing ball craft

This is a tutorial of sorts on a kissing ball I’ve made to increase my Valentine’s Day decor which will be brought out soon!

I’m excited to share this because I’ve really enjoyed making it and was inspired by other crafty bloggers who have made similar kissing balls or wreaths made of crepe paper roses. This is a fairly inexpensive craft. All you need is crepe paper (I got 2 rolls for a dollar at the dollar tree), hot glue gun, glue sticks, a styrofoam ball (I’m guessing this is the most expensive part, but I had some left over from a craft a few years ago that I bought with a coupon at hobby lobby), and a ribbon.

To make the crepe paper roses I first ripped a piece of crepe paper of about 18-24 inches long.


Then I crumpled the piece and then straightened it back out and begin rolling on one end.


After about 4 or 5 turns I began twisting it around the top of the rose looser than I started just like a real rose.


The key is to loosely twist and turn the crepe paper around the top then hot glue a tiny dot to the end of the crepe paper to attach it and make sure it does not unravel on you.


I made a bunch, then cut the “stem” short on each for easier gluing to styrofoam ball.


It really helped me to set the stryofoam ball on a roll of masking tape to keep it still while I glued the roses on. Before I started gluing roses on I attached a ribbon with hot glue as a hanger but this is optional if you want to just set it on a mantel or in a decorative bowl. The hanging kissing ball is traditional like mistletoe and when you and your sweetie walk under it you kiss 🙂
To attach the roses just put a small dot of hot glue where you want to attach it and gently push the rose on and hold for a minute. Put the roses fairly close together so you cannot see the styrofoam ball. Its pretty simple and fun. I got pretty carried away just watching tv and making roses so I’m working on a wreath now of white, pink and red ones! I hope you enjoy, any questions I’d be glad to try and answer. Happy crafting!

Domesticity

Christmas Homemade gifts: Child’s apron

As promised I am posting about some of the homemade gifts I made this year for family and friends.  Today I am writing about the aprons I made for my girls who absolutely love cooking with me now.  I first saw some adorable ones in a specialty store for over 20 dollars each, well I knew this was way too much for us so I decided to make some on my own.   So off to Hobby Lobby I went and found adorable child’s aprons just waiting for personalization from me.   I bought two hot pink child’s aprons for 2.99 each and I used my 40% off coupon on one and the total cost was around 5 dollars for both.  Then I had some cute white iron on letters at home and picked out the girls names and ironed them on.  Next I went through my ribbon stash and found some cute zebra print ribbon I’d used some of for another craft a year ago and used permanent fabric glue to attach it to the aprons to embellish it further.  I could have done more, but I loved them just the way they were.  Simple easy, only took about 20 min start to finish and cost 5 dollars as opposed to buying them (without their names on them) for over 40 for both!   Hope this inspires you, happy crafting!